Have you ever wrinkled your nose at the mention of Brussels sprouts? I get it. For years, these little cabbage-like vegetables were the poster child for “food kids hate.” But I’m about to change your mind completely. After countless experiments in my kitchen, I’ve perfected a method that transforms these often-maligned veggies into something truly extraordinary—crispy on the outside, tender on the inside, and packed with flavor that will have even the most committed Brussels sprout skeptics coming back for seconds.
When I first started cooking Brussels sprouts, they often turned out mushy, bitter, or just plain disappointing. But through trial and error (and yes, some spectacular failures), I discovered the secrets to making them absolutely irresistible. This isn’t just another Brussels sprouts recipe—it’s a game-changer.
The Brussels Sprout Renaissance
Brussels sprouts have undergone quite the transformation in the culinary world. Once boiled into sulfurous submission in kitchens across America, these nutritional powerhouses now feature prominently on the menus of high-end restaurants and family dinner tables alike.
Their comeback story isn’t just about better cooking techniques (though that’s a huge part of it). Modern Brussels sprouts are actually less bitter than their predecessors thanks to selective breeding. Farmers have deliberately bred out some of the compounds that gave Brussels sprouts their infamous bitter taste, making today’s varieties naturally more palatable.
I’ve converted dozens of former Brussels sprout haters with this recipe. My brother-in-law, who once claimed he’d rather eat the napkin than touch a Brussels sprout, now requests them at every family gathering. That’s the power of proper preparation!
The Nutritional Goldmine
Before we dive into cooking, let’s appreciate what these little green globes bring to your plate nutritionally:
| Nutrient | Amount per 1 cup (156g) | % Daily Value | Benefits |
|---|---|---|---|
| Vitamin K | 156.2 mcg | 195% | Supports bone health and blood clotting |
| Vitamin C | 74.8 mg | 125% | Boosts immune system, promotes collagen production |
| Fiber | 3.8 g | 15% | Supports digestive health and feelings of fullness |
| Vitamin A | 664 IU | 13% | Promotes eye health and immune function |
| Folate | 53.7 mcg | 13% | Critical for cell division and DNA synthesis |
| Manganese | 0.3 mg | 13% | Supports metabolism and bone formation |
| Potassium | 389 mg | 11% | Regulates fluid balance and muscle contractions |
| Vitamin B6 | 0.2 mg | 10% | Supports brain development and function |
| Thiamin | 0.1 mg | 8% | Helps convert food into energy |
| Protein | 3 g | 6% | Builds and repairs tissues |
Besides these impressive stats, Brussels sprouts are loaded with antioxidants and have been associated with reduced inflammation, improved blood sugar control, and even a lower risk of certain cancers. All this nutrition comes with just 56 calories per cup!
Selecting the Perfect Brussels Sprouts
The journey to the best Brussels sprouts of your life begins at the store or farmers market. Here’s what I look for:
- Size matters: Opt for smaller sprouts when possible. They tend to be sweeter and cook more evenly. Aim for sprouts that are similar in size for consistent cooking.
- Color is key: Look for bright green sprouts with tightly packed leaves. Avoid any with yellowing leaves, which indicates age.
- Firmness test: The sprouts should feel firm when gently squeezed, not soft or spongy.
- Stem check: Fresh cuts at the stem end indicate recent harvesting. Avoid sprouts with stems that look dried out or discolored.
- Seasonal advantage: While available year-round, Brussels sprouts peak from late fall through winter. They develop a sweeter flavor after exposure to frost, making winter sprouts often the tastiest.
If you can find them still attached to their stalk, that’s a bonus—they’ll stay fresher longer. I once brought home a full stalk from the farmers market, and my kids thought it looked like something from a science fiction movie!
The Secret Ingredients
What elevates ordinary Brussels sprouts to extraordinary ones? It’s all about the right combination of ingredients:
- Brussels sprouts: 2 pounds, trimmed and halved (or quartered if large)
- Extra virgin olive oil: 3 tablespoons (don’t skimp on quality here)
- Kosher salt: 1 teaspoon (Diamond Crystal brand preferred)
- Freshly ground black pepper: ½ teaspoon
- Balsamic glaze: 2 tablespoons (the thick, syrupy kind)
- Honey: 1 tablespoon (local if possible)
- Fresh garlic: 4 cloves, minced
- Red pepper flakes: ¼ teaspoon (adjust to your heat preference)
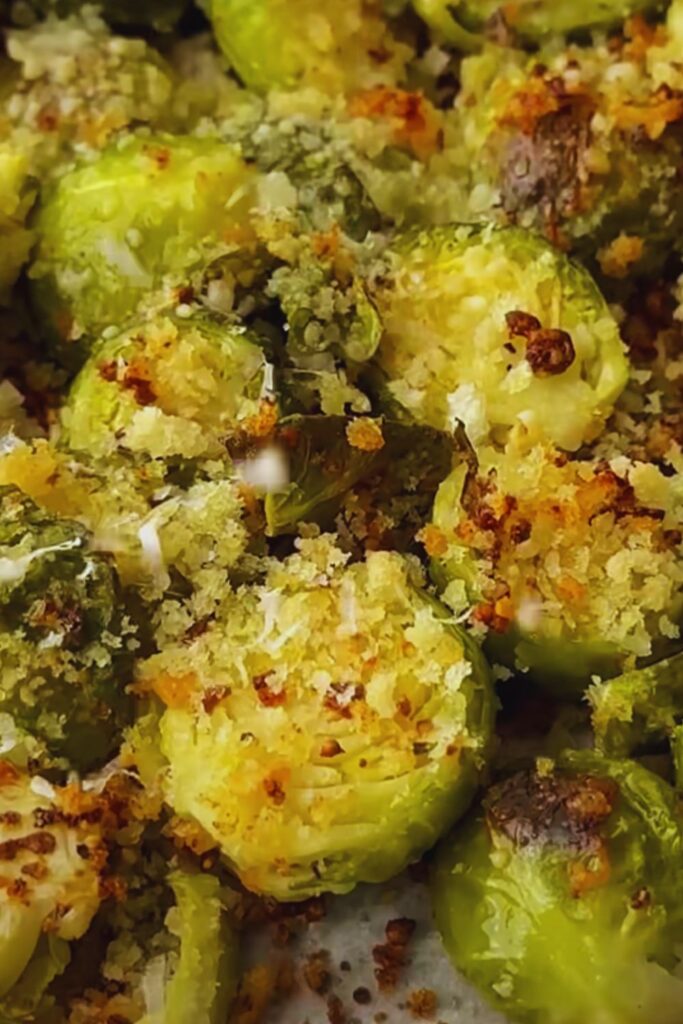
- Parmesan cheese: ⅓ cup freshly grated (optional but highly recommended)
- Pancetta or bacon: 4 ounces, diced (optional for a savory version)
The magic in this recipe comes from the balance of flavors. The natural sweetness of the honey counteracts any residual bitterness in the sprouts, while the balsamic adds a complex tanginess that transforms the entire dish. The red pepper flakes provide just enough heat to wake up your taste buds without overwhelming the other flavors.
Preparation Techniques
Preparing Brussels sprouts properly is crucial for the best results:
- Trimming: Remove any yellow or damaged outer leaves. Trim the stem end, but don’t cut too much or the leaves will fall apart.
- Halving (or quartering): Cut the sprouts through the stem end. This creates flat surfaces that will caramelize beautifully in the oven. For larger sprouts, quarter them to ensure even cooking.
- The all-important wash: Rinse the prepared sprouts thoroughly in cold water, then dry them completely. This is crucial! Excess moisture is the enemy of crispiness.
- Space matters: Don’t overcrowd your baking sheet. Each sprout needs room to release steam, or they’ll steam rather than roast.
The halving technique is non-negotiable in my kitchen. I’ve tried whole Brussels sprouts, and while they have their place, they simply don’t develop the same irresistible crispy edges that make this recipe so special.
The Ultimate Roasting Method
Now for the main event—the roasting technique that will transform your Brussels sprouts experience:
- Preheat your oven to 425°F (220°C). This high temperature is crucial for developing crispy exteriors.
- In a large bowl, toss the prepared Brussels sprouts with olive oil, salt, and pepper until evenly coated.
- If using pancetta or bacon, cook it in a skillet until it begins to crisp, then set aside, reserving the fat.
- Spread the Brussels sprouts in a single layer on a large baking sheet, cut sides down. If you used pancetta or bacon, drizzle a little of the rendered fat over the sprouts for extra flavor.
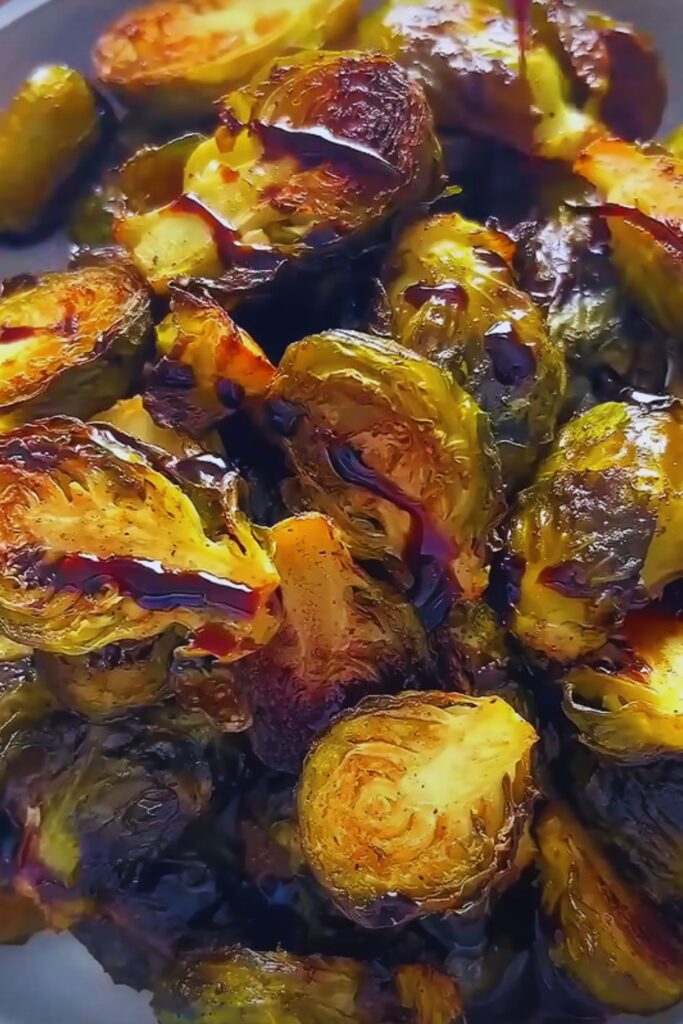
- Roast for 15 minutes, then remove from the oven and carefully flip each sprout. Return to the oven for another 10-15 minutes until the edges are deeply caramelized and crispy.
- While the sprouts are roasting, mix together the balsamic glaze, honey, minced garlic, and red pepper flakes in a small bowl.
- Remove the sprouts from the oven, drizzle with the balsamic-honey mixture, and toss to coat.
- Return to the oven for a final 5 minutes, until the glaze is bubbling and slightly reduced.
- If using cheese, sprinkle the freshly grated Parmesan over the hot sprouts immediately after removing from the oven.
- If using pancetta or bacon, toss it with the finished sprouts before serving.
The key to this method is patience—don’t rush the roasting process. Those extra minutes make all the difference between good and mind-blowing Brussels sprouts.
Variations to Excite Your Palate
Once you’ve mastered the basic technique, try these exciting variations:
Asian-Inspired Brussels Sprouts
- Replace the balsamic-honey mixture with 2 tablespoons soy sauce, 1 tablespoon honey, 1 tablespoon rice vinegar, and 1 teaspoon sesame oil
- After roasting, sprinkle with sesame seeds and sliced green onions
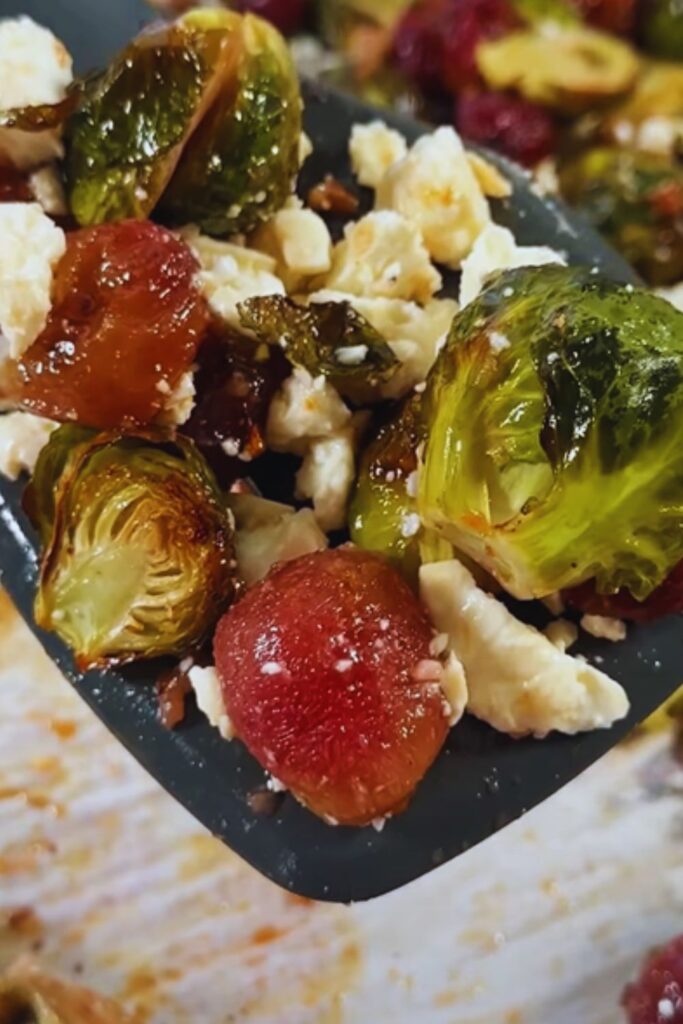
Mediterranean Brussels Sprouts
- Add lemon zest to the olive oil before roasting
- Finish with a squeeze of fresh lemon juice, crumbled feta cheese, and chopped fresh dill
Maple-Mustard Brussels Sprouts
- Substitute pure maple syrup for the honey
- Add 1 tablespoon whole grain mustard to the glaze
- Finish with chopped toasted pecans
Spicy Buffalo Brussels Sprouts
- Toss roasted sprouts with 3 tablespoons Buffalo sauce mixed with 1 tablespoon butter
- Serve with blue cheese crumbles and a side of ranch dressing for dipping
I developed the Asian-inspired variation after a memorable meal at a fusion restaurant in San Francisco, and it’s become a close second to my original recipe. The umami from the soy sauce paired with the slight sweetness creates something truly special.
Common Mistakes to Avoid
Even seasoned cooks can fall prey to these Brussels sprouts pitfalls:
Overcrowding the pan: This leads to steaming instead of roasting, robbing you of those crispy edges. Use two pans if needed.
Underseasoning: Brussels sprouts can handle plenty of salt and pepper. Be generous.
Undercooking: Don’t pull them out too soon. Those deeply browned edges contain tremendous flavor.
Too much moisture: Make sure your sprouts are thoroughly dried after washing, and don’t cover them while still hot (this creates condensation).
Cutting through the stem: Always halve Brussels sprouts through the stem, which helps hold the leaves together during cooking.
One of my most memorable cooking disasters involved serving undercooked Brussels sprouts at a dinner party. Let’s just say they weren’t the hit I’d hoped for. Learn from my mistake and give them the full cooking time they deserve!
Serving Suggestions
These Brussels sprouts are versatile enough to complement almost any main dish:
- Pair with a perfectly roasted chicken for a simple yet impressive dinner
- Serve alongside a grilled steak for a steakhouse-worthy meal at home
- Add to a holiday spread—they’re substantial enough to hold their own among traditional favorites
- Toss with cooked pasta, additional olive oil, and extra Parmesan for a quick vegetarian main dish
- Add to grain bowls for extra flavor and nutrition
- Create a stunning side dish platter with these Brussels sprouts, roasted carrots, and sweet potatoes
For an elevated presentation, serve on a warmed platter and garnish with additional fresh herbs, lemon zest, or an extra drizzle of balsamic glaze.
A tip from my catering days: these Brussels sprouts actually hold up well for about 20 minutes after cooking, making them ideal for entertaining when you don’t want to be fussing with last-minute details.
Storage and Reheating
Made too many? Lucky you! Here’s how to store and reheat them:
- Refrigeration: Store cooled Brussels sprouts in an airtight container in the refrigerator for up to 3 days.
- Reheating in the oven: Place in a single layer on a baking sheet in a 350°F (175°C) oven for 5-7 minutes until heated through.
- Reheating in an air fryer: 2-3 minutes at 350°F (175°C) will restore much of the original crispiness.
- Avoid the microwave: While convenient, microwaving will make them soggy.
These Brussels sprouts also make a fantastic addition to grain bowls and salads the next day—no reheating required! I often make a double batch specifically for this purpose.
Seasonal Adaptations
Brussels sprouts are at their peak in the colder months, but this recipe can be adapted year-round:
- Fall/Winter: Emphasize warming spices like cinnamon or nutmeg in your glaze
- Spring: Lighten things up with fresh herbs like dill and parsley
- Summer: Add a touch of citrus zest and juice for brightness
During the height of Brussels sprouts season (late fall through winter), look for them still on the stalk for the freshest flavor. I’ve found that post-frost Brussels sprouts have a natural sweetness that requires less honey in the recipe.
Questions & Answers
Q: Can I prepare Brussels sprouts ahead of time? Yes, you can trim and halve Brussels sprouts up to 2 days in advance. Store them in an airtight container in the refrigerator. I recommend waiting to wash them until just before cooking to prevent excess moisture.
Q: Why are my Brussels sprouts mushy instead of crispy? The most common causes are overcrowding the pan, too low oven temperature, or not drying the sprouts thoroughly after washing. Make sure to spread them in a single layer with space between each sprout, use a 425°F oven, and dry completely before roasting.
Q: Are frozen Brussels sprouts a good substitute? While fresh is preferable for this recipe, you can use frozen in a pinch. Don’t thaw them first—roast directly from frozen, adding about 5-10 minutes to the cooking time. They won’t get quite as crispy, but they’ll still be delicious.
Q: How do I reduce the bitterness in Brussels sprouts? The high-heat roasting method in this recipe naturally reduces bitterness. If you’re particularly sensitive to bitter flavors, add a bit more honey to the glaze, or try blanching the sprouts in salted water for 2 minutes before roasting.
Q: Can I make this recipe vegan? Absolutely! Simply omit the Parmesan cheese and substitute maple syrup for the honey. The bacon or pancetta is already listed as optional.
Q: How do I know when Brussels sprouts are done? They should be deeply golden on the outside, especially on the cut edges, and tender when pierced with a fork. The outer leaves may become very dark and crispy—these are actually the most flavorful bites!
Q: My kids hate vegetables. Will they really eat these? In my experience, these Brussels sprouts have a high success rate even with picky eaters. The caramelization reduces bitterness, and the sweet-tangy glaze appeals to younger palates. Start with a small portion and let them discover how delicious they are. You might be surprised!
Q: Can I use a different vinegar if I don’t have balsamic? The caramelized sweetness of balsamic glaze is ideal, but in a pinch, you could substitute pomegranate molasses or reduced red wine vinegar with a touch more honey.
A Final Note
The transformation of Brussels sprouts from my childhood nightmare to my adult obsession is proof that proper cooking techniques can revolutionize how we experience food. This recipe isn’t just about making a vegetable palatable—it’s about elevating it to something craveworthy.
I’ve served these Brussels sprouts at Thanksgiving dinners, casual weeknight meals, and everything in between. They’ve never failed to impress, and I’ve lost count of how many people have requested the recipe afterward.
So give these little green gems another chance. With the right preparation, I’m confident they’ll earn a permanent place in your cooking repertoire. Who knows? They might just become the best Brussels sprouts of your life.